Office 365 Groups are rapidly gaining momentum especially with the popularity of apps such as Microsoft Teams. Office 365 Groups is the foundation for apps such as Microsoft Planner, Microsoft Teams, Power BI groups, etc. For example, when you create a Microsoft Team, an Office 365 Group is automatically created whether you are using all the features of the Office 365 Group or not.
The underlying foundation for an Office 365 Group consists of the following services and components:
- Exchange shared mailbox
- Mailbox to record conversations between members
- Calendar to post events and appointments for the Group
- SharePoint site collection
- Document library for storing and synching files
- OneNote Notebook for taking Group notes
- All the features of a SharePoint team site and more
- Microsoft Stream video portal
- Microsoft Planner plan for tracking project tasks
- Power BI workspace for creating dashboards and reports (requires a premium Power BI license for all members)
Before we go any further, let’s define some personas for this blog article. You’ll see these referenced throughout this article.
 |
Office 365 tenant administrator or “IT Pro” |
 |
Internal Office 365 tenant users |
 |
External Office 365 tenant guests |
So what’s the problem?
 As an IT Pro, you might be thinking, “All Office 365 Groups contain an Exchange shared mailbox, a SharePoint site collection with a document library, OneNote notebook and a Stream video portal?” That’s correct, and users can create Office 365 Groups by default. Microsoft doesn’t waste anytime promoting this functionality and encouraging self-service provisioning and management of Office 365 Groups and related applications. This can cause what I’ve heard called digital debris in your Office 365 tenant and on-premises Exchange organization if you have a hybrid deployment.
So what administrative options are available to IT Pros to have better control of Office 365 Groups? In this article, we will cover administration, securing external access, and other methods to control digital debris for Office 365 Groups. So, let’s get to it!
Controlling who can create Office 365 groups
 By default, all Office 365 users can create Office 365 Groups. In this example, a regular Office 365 user is creating an Office 365 group named “Office 365 Group”. Yeah, this is a very generic name, know try to imagine what group names users might come up with. How would other users know the purpose of the group? Additionally, the user can establish the privacy for the group and allow all members including external users to email the group.
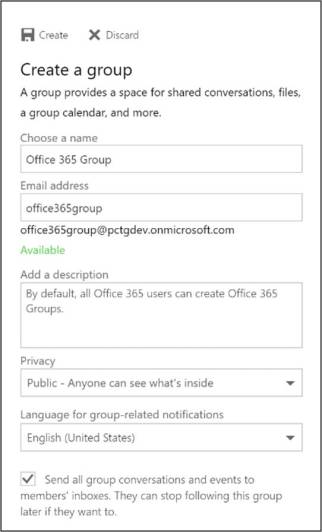

As an IT Pro, you may want to control who can create Office 365 Groups so they don’t spread wildly throughout your organization. You can limit who can create Office 365 Groups to say the IT department or maybe business unit leads to provide another management layer. This configuration requires you create a security group for this purpose and PowerShell for configuration. In the following example, only members of the “O365 Group Creators” security group can create Office 365 Groups (see screenshot below).
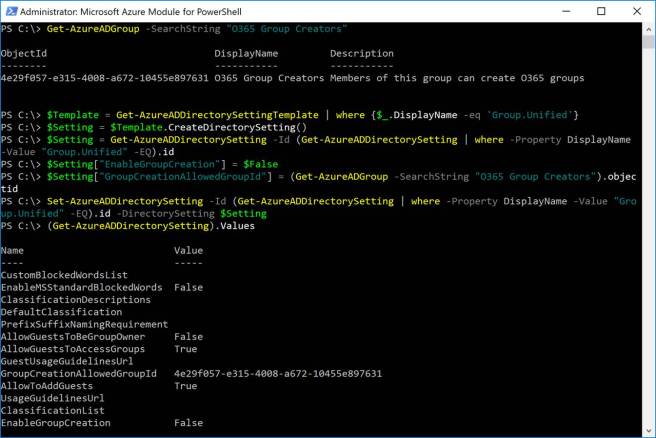
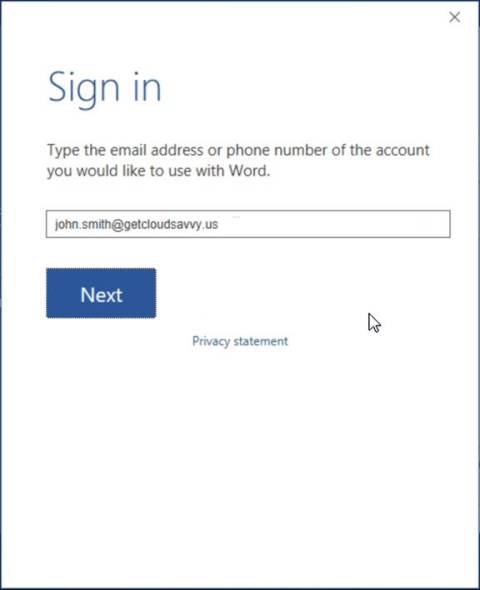
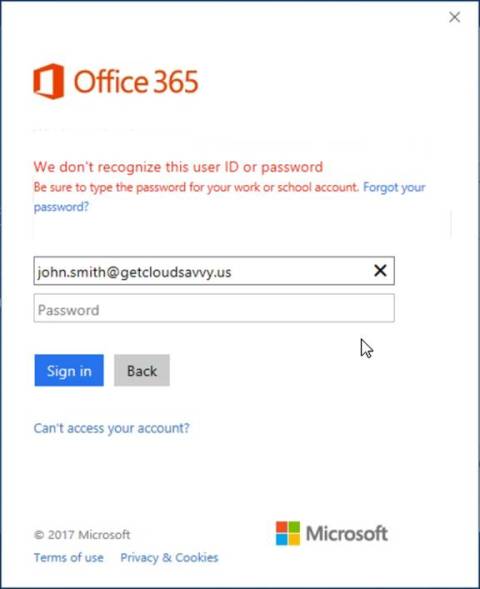
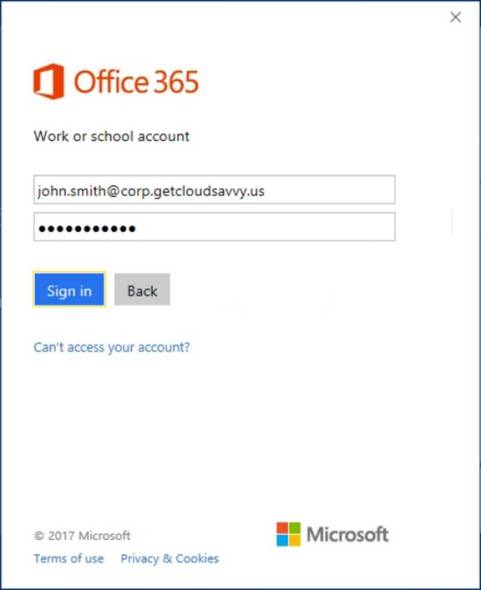
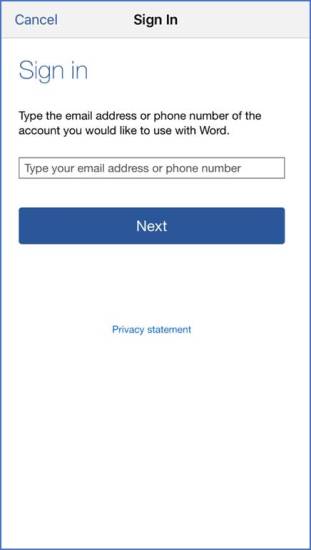
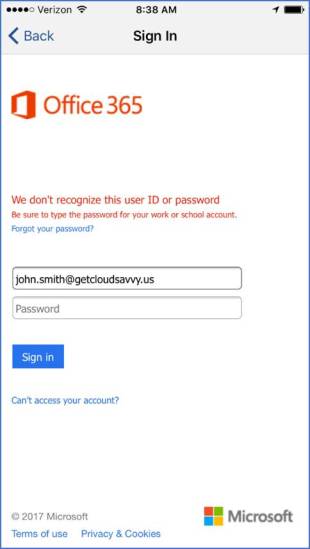
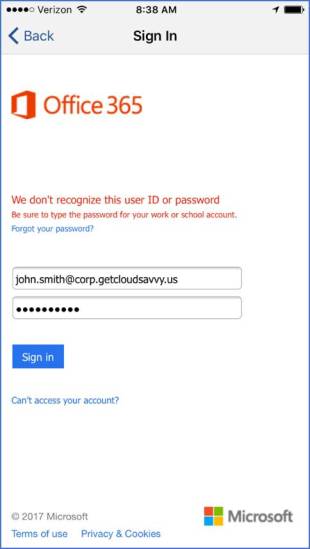
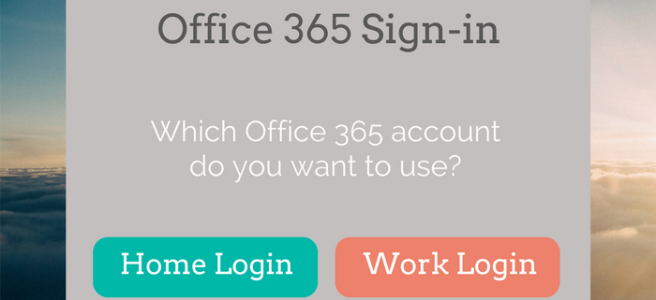
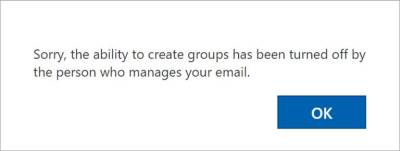
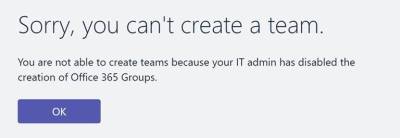
Office 365 users who are not a member of the “O365 Group Owners” security group are not allowed to create Office 365 groups in all Office 365 services that use groups including Outlook, Planner, SharePoint, Yammer, and Microsoft Teams. The Office 365 user experience in this scenario is display below when trying to create an Office 365 Group or Microsoft Teams team.
For detailed instructions on managing who can create Office 365 Groups, Planner plans and Microsoft teams, please visit:
https://support.office.com/en-us/article/Manage-who-can-create-Office-365-Groups-4c46c8cb-17d0-44b5-9776-005fced8e618?ui=en-US&rs=en-US&ad=US
Controlling External Sharing
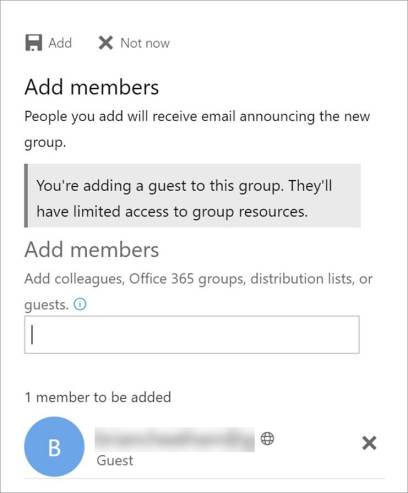
By default, guest access is enabled for Office 365 Groups. This means users external to your organization can be added to an Office 365 Group and collaborate with internal users. Office 365 Group owners and Office 365 Global Admins can add guests to Office 365 Groups. Consider the following default scenario, internal users can create an Office 365 Group where as an owner they can add external users. These external users would have the ability to collaborate with internal users in your organization including sharing content such as emails, OneNote notebooks and files stored in SharePoint document libraries. Below is the default experience for an Office 365 Group owner.

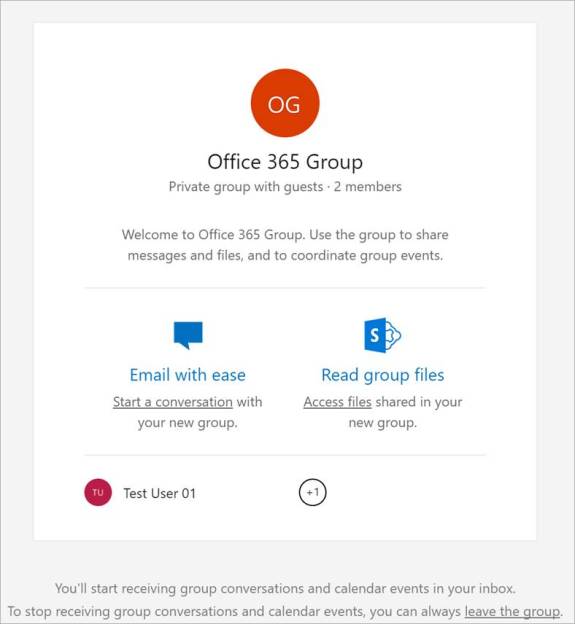
External users can collaborate with internal users in your organization including sharing content such as emails, OneNote notebooks and files stored in SharePoint document libraries. When invited to join an Office 365 Group, external users would receive a welcome email to share messages and files with other users in your internal Office 365 organization (see screenshot below).
Where the concept of self-service and adoption of Office 365 workloads is appealing, there is still a delicate balance between productivity and security. The good news is Microsoft provides several ways for you to control external access. We will cover several of these methods including:
- Disable external sharing for the Office 365 tenant
- Disable external sharing for an individual Office 365 Group
- Restrict external sharing based upon security groups
- Restrict external sharing using allow/block domain lists
Disable external sharing using the SharePoint admin center
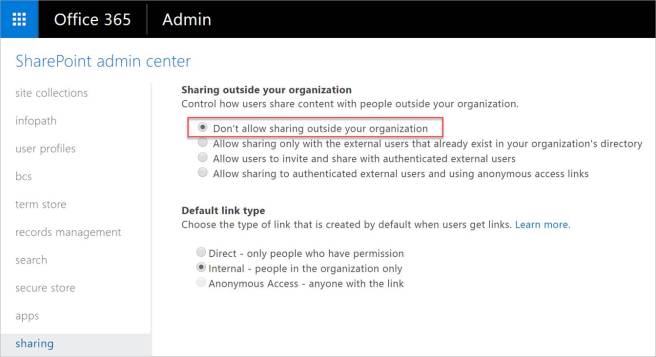
There are several ways to disable sharing at the Office 365 tenant level via the SharePoint Online admin center. In the screenshot below, we have selected the option to “Don’t allowing sharing outside your organization”. This setting would not allow external sharing and hold true for all Office 365 groups and SharePoint sites as this is a SharePoint admin center configuration (see screenshot below).
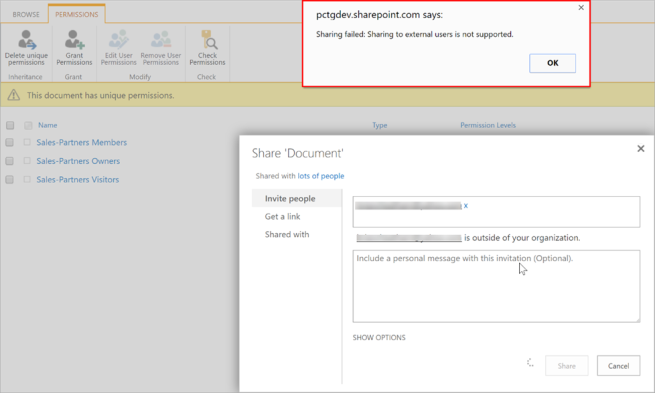
With external sharing disabled, Office 365 users would not be able share with an external user. When attempting to share a document via the sharing dialog, internal Office 365 users would receive a similar message to the one displayed in the example.

If an external user attempted to access a SharePoint Online resource when external sharing was disabled, they would receive the following message.

Additional Tenant-Level Settings
SharePoint Online has both global (tenant-wide) and site collection settings for external sharing. The tenant-level settings override any settings at the site collection level.
For your SharePoint Online tenant and for each individual site collection, you can choose from the following basic sharing options:
- No external sharing – sites and documents can only be shared with internal users in your Office 365 subscription.
- Sharing only with external users in your directory – sites, folders, and documents can only be shared with external users who are already in your Office 365 user directory. For example, users who have previously accepted a sharing invitation or users who you have imported from another Office 365 or Azure Active Directory tenant.
- Sharing with authenticated external users – sites, folders, and documents can be shared with external users who have a Microsoft account or a work or school account from another Office 365 subscription or an Azure Active Directory subscription. This is the default setting for Office 365 tenants which allows for Office 365 Group guest access.
- Sharing with anonymous users – documents and folders (but not sites) can be shared via an anonymous link where anyone with the link can view or edit the document, or upload to the folder.
The list above is in the order of most to least restrictive. Whichever option you choose, the more restrictive functionality is still available to you. For example, if you choose to allow sharing with anonymous users, you can still share with authenticated external users and users already in your directory, including internal users.
For more details, please visit https://support.office.com/en-ie/article/Turn-external-sharing-on-or-off-for-SharePoint-Online-6288296a-b6b7-4ea4-b4ed-c297bf833e30#ID0EAABAAA&ID0EAABAAA.
Disable adding organization guests using the Office 365 admin center
You can also control if Office 365 users can add new guests to Office 365 groups and SharePoint Online in the organization. This would disable the ability for group owners or administrators to add new guests to Office 365 groups. This configuration is possible via the Office 365 Admin Center under Settings à Security & privacy -> Sharing (see screenshot below).
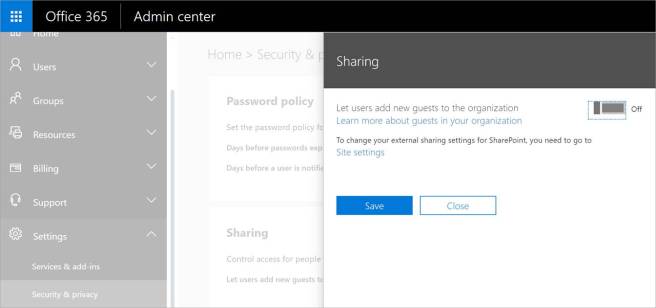
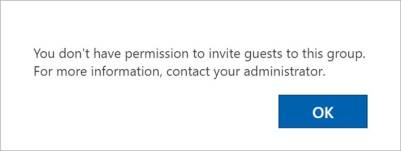
With this setting configured in the Office 365 admin center, the following message would be displayed for users trying to add an external user to an Office 365 group.
Disable adding Office 365 Group guests in the Office 365 admin center
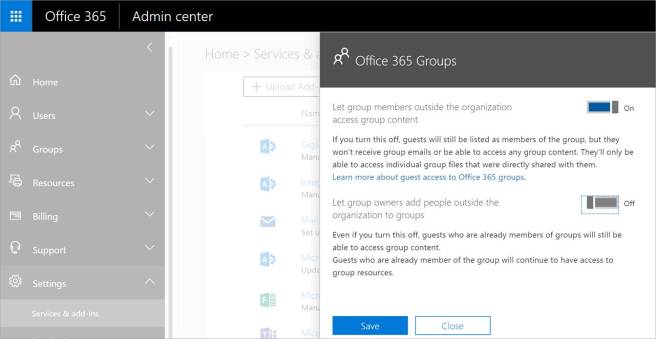
You can allow administrators to add external users and disable the ability for Office 365 group owners to add external users. This configuration is possible via the Office 365 Admin Center under Settings -> Services & add-ins -> Office 365 Groups (see screenshot below). NOTE: This configuration only affects newly created Office 365 Groups. Owners of existing groups will not be restricted from adding external users. Likewise, if this setting is reversed, only newly created Office 365 Groups are affected.
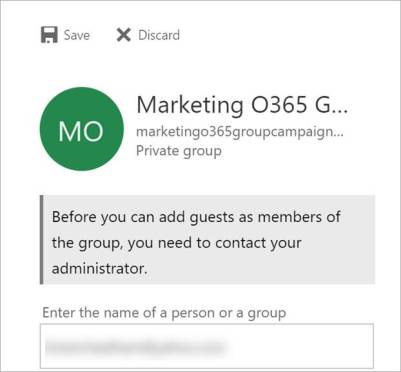
Once this configuration is in place, Office 365 Group owners will receive the following message when trying to add external users to their Office 365 group.
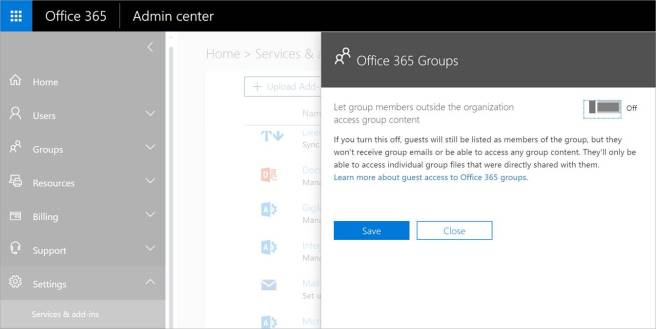
Disable external access to Office 365 Group content in the Office 365 admin center
Another Office 365 tenant-level configuration is the ability to restrict external users from accessing Office 356 Group content and receiving emails. This basically disables the ability for all external users to access Office 365 group content, UNLESS there is a specific file or folder shared with them. This configuration is possible via the Office 365 Admin Center under Settings -> Services & add-ins -> Office 365 Groups (see screenshot below). NOTE: This configuration only affects newly created Office 365 Groups. Owners of existing groups will not be restricted from adding external users. Likewise, if this setting is reversed, only newly created Office 365 Groups are affected.
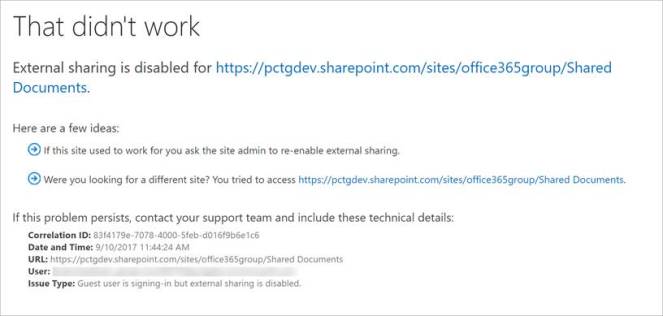
If an external user attempted to access an Office 365 Group resource when external sharing was disabled, they would receive the following message.
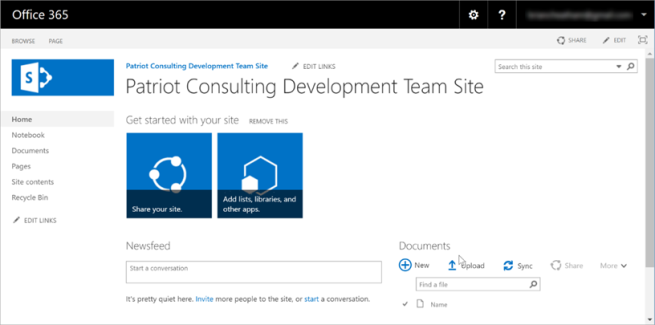
This screenshot is proof the “Let members outside the organization access group content” does not affect standard SharePoint Online sites only Office 365 group sites and their content.
Disable external access to Office 365 Group using PowerShell
As an IT Pro, you can control per-Office 365 Group sharing settings. In the following PowerShell example, we have update the default value of “ExternalUserSharingOnly” to “Disabled”. This is the equivalent of configuring the “Don’t allow access outside the organization” setting in the SharePoint Online admin center for tenant-level configuration. In this case, it only affects the individual Office 365 Group. For more information on how this configuration is possible, please visit the following link:
https://support.office.com/en-ie/article/Turn-external-sharing-on-or-off-for-SharePoint-Online-6288296a-b6b7-4ea4-b4ed-c297bf833e30#ID0EAABAAA=Office_365_Groups

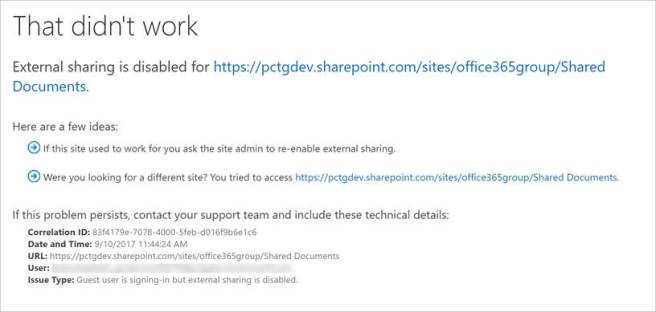
If an external user attempted to access the Office 365 Group when external sharing was disabled, they would receive the following message.
Restricting who can share outside the organization using the SharePoint admin center
As an IT Pro, you can control who can share outside the organization with authenticated external users to an Office 365 security group using the SharePoint admin center. This configuration setting is located under “sharing” in the SharePoint admin center in Office 365. In the example below, Office 365 users in the O365-ShareExternalAuthenticated security group can share content outside the organization.
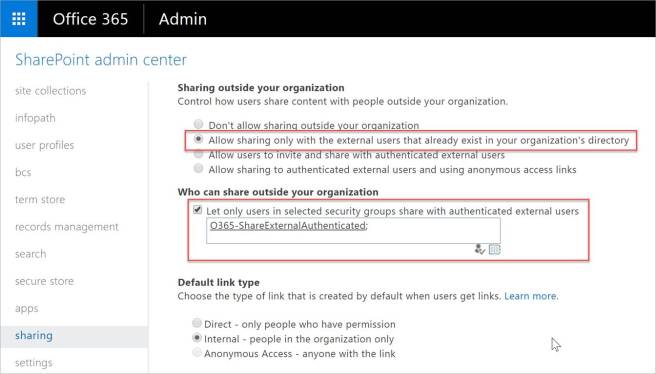
With this configuration in place, Office 365 users who are not a member of the O365-ShareExternalAuthenticated security group would receive the following message when trying to share content with external users.
Restricting who can share anonymous links using the SharePoint admin center
As an IT Pro, you can control who can share outside the organization with authenticated external users AND using anonymous links to an Office 365 security group using the SharePoint admin center. This configuration setting is located under “sharing” in the SharePoint admin center in Office 365. In the example below, Office 365 users in the O365-ShareExternalAuthenticatedAnonymous security group can share content outside the organization including sharing anonymous links.

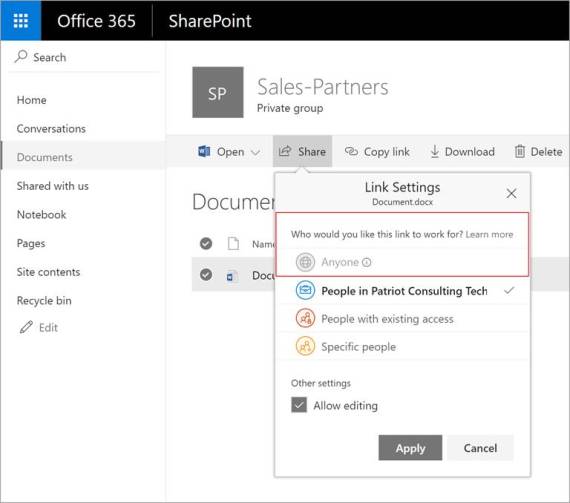
With this configuration in place, Office 365 users who are not a member of the O365-ShareExternalAuthenticatedAnonymous security group would not be able to share with external users OR select “Anyone” to send anonymous links. The “Anyone” option is grayed out in the screenshot to the right.
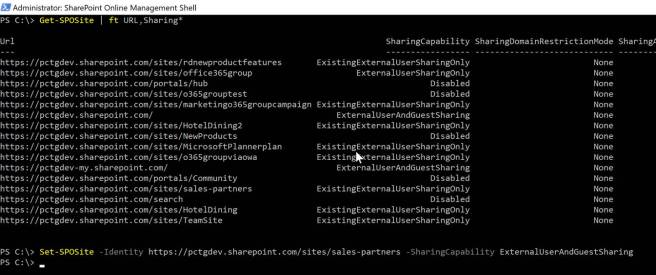
You can use Get-SPOSite | ft URL,Sharing* cmdlet to review the external sharing configuration for each Office 365 Group. Remember each Office 365 Group has an underlying SharePoint site collection which has individual configuration settings. In the lab, the Office 365 Group I was using for testing was configured for the default “ExistingExternalUserSharingOnly”. To allow for anonymous links sharing, the Set-SPOSite cmdlet was used to update the sharing capability of the individual Office 365 Group or the SharePoint site collection (see screenshot below).
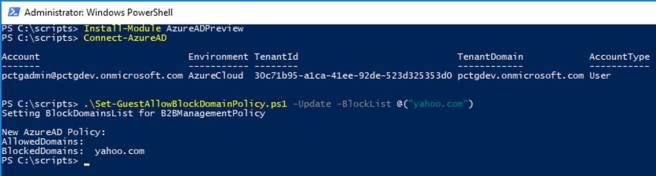
Restricting guest access to external domains using PowerShell
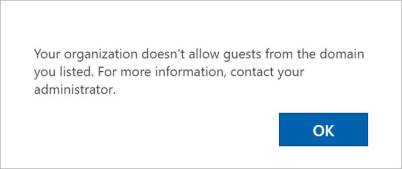
As an IT Pro, you can allow or block guest users from a specific external domain. For example, let’s say your business (Contoso) has a partnership with another business (Fabrikam). You can add Fabrikam to the allow list so your users can add those guests to their groups. Or, let’s say you want to block personal email address domains. You can set up a block list that contains domains like Gmail.com or Yahoo.com. In the example below, a guest with a @yahoo.com email address cannot be added to Office 365 Groups. NOTE: This list doesn’t apply to already added guest members, this will be enforced for all the guests added after the list is setup. However, you can remove them through the script.
Using the Office 365 Group block list, Office 365 users would not be able to add a guest user with a @yahoo.com email address as indicated in the screenshot below.
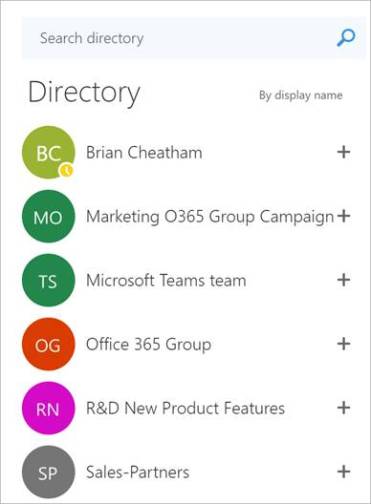
Hiding Office 365 Groups from the directory
By default, Office 365 Groups include a shared Exchange Online mailbox which is visible in the Exchange Online Global Address List (GAL). Office 365 Group members can access their Office 365 Groups via Outlook on the Web. Additionally, all Office 365 Groups are displayed in the directory by default.
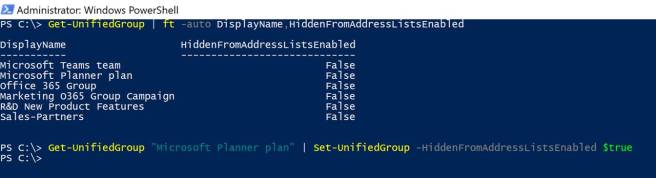
As an IT Pro, you can control which Office 365 Groups are displayed in the Exchange Online GAL. Since the Office 365 Group includes a shared mailbox, you can leverage the Get-UnifiedGroup cmdlet in Exchange Online PowerShell to hide certain Office 365 Groups from the directory. In the example, below the “Microsoft Planner plan” Office 365 Group has been hidden from the GAL.
NOTE: You should be cautious when leveraging this setting as you could affect mail delivery if Office 365 users are using the directory to address Office 365 Groups.
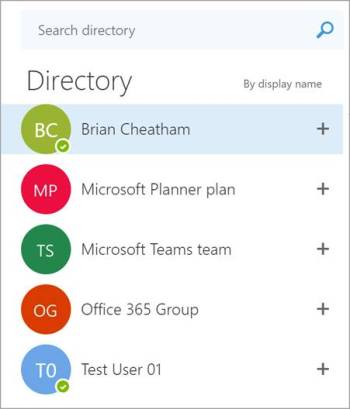
Office 365 Group members can still access their Office 365 Groups via Outlook on the Web, however the “Microsoft Planner plan” Office 365 group is hidden from the GAL.
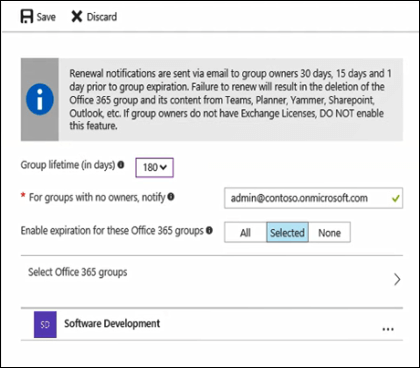
Office 365 Group Cleanup
There is a recently released feature called Office 365 Group expiration which provides administrators and users a way to clean up unused or “expired” groups. Expiration policies can help them remove inactive groups from their tenant automatically with an approval workflow. When a group expires it is “soft-deleted” which means it can still be recovered for up to 30 days. This feature is fairly new and a bit limited at this point in time. It would be nice if Microsoft would have the option to trigger expiration based upon inactivity.
You can find more information about the Office 365 Group expiration feature at:
https://support.office.com/en-us/article/Office-365-Group-Expiration-Policy-8d253fe5-0e09-4b3c-8b5e-f48def064733
However, I did find this useful script on the TechNet gallery which reports on inactivity of Office 365 Groups. The information provided in this report could be used to determine which Office 365 Groups are inactive and expire them using the Group expiration feature.
https://gallery.technet.microsoft.com/Check-for-obsolete-Office-c0020a42
Summary
In this article, we covered administration, securing external access, and other methods to control digital debris for Office 365 Groups. As you can see, IT Pros have some administrative options available for controlling Office 365 Groups. Microsoft continues to make improvements in the administrative options available for Office 365 Groups including the applications which leverage their foundation.
Microsoft is currently working on an Azure Active Directory Premium (P1) feature called Office 365 Groups Naming Policy which enables administrators to enforce a consistent naming strategy for O365 groups created by users in the organization. It helps identify the function or membership, geographic region, who created the group and helps categorize groups in GAL. Myself along with many of our customers are looking forward to this feature release.
For more information on Office 365 Groups Naming Policy, please visit:
https://support.office.com/en-us/article/Office-365-Groups-Naming-Policy-6ceca4d3-cad1-4532-9f0f-d469dfbbb552
Thanks for tuning in and please let me know if you have any questions, comments or if you would like more information on administration of Office 365 Groups. My next planned blog is on administration of Microsoft Teams so stayed tuned!